
Tutorial – Outfit Preparation for Vanity Fair Horse Show
A tutorial covering all the basics on how to edit and adjust your outfit/costume, then quickly wear it for the ABC Vanity Fair Horse Show.
STEP 1
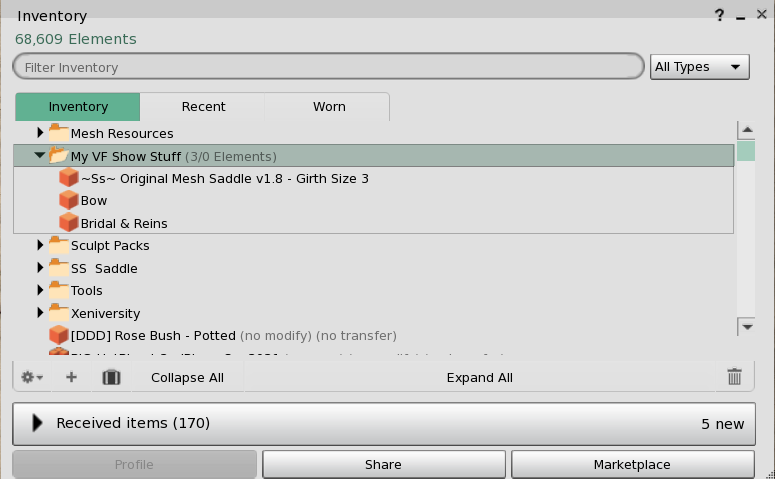
Create A Folder
Create a folder in your inventory and place all your tack items and any decorative items you wish to display on the horse. For example a saddle and bridle set, flowers, bows, jewellery or any thing else you wish to put on your horse
STEP 2
Attach all Items to pelvis
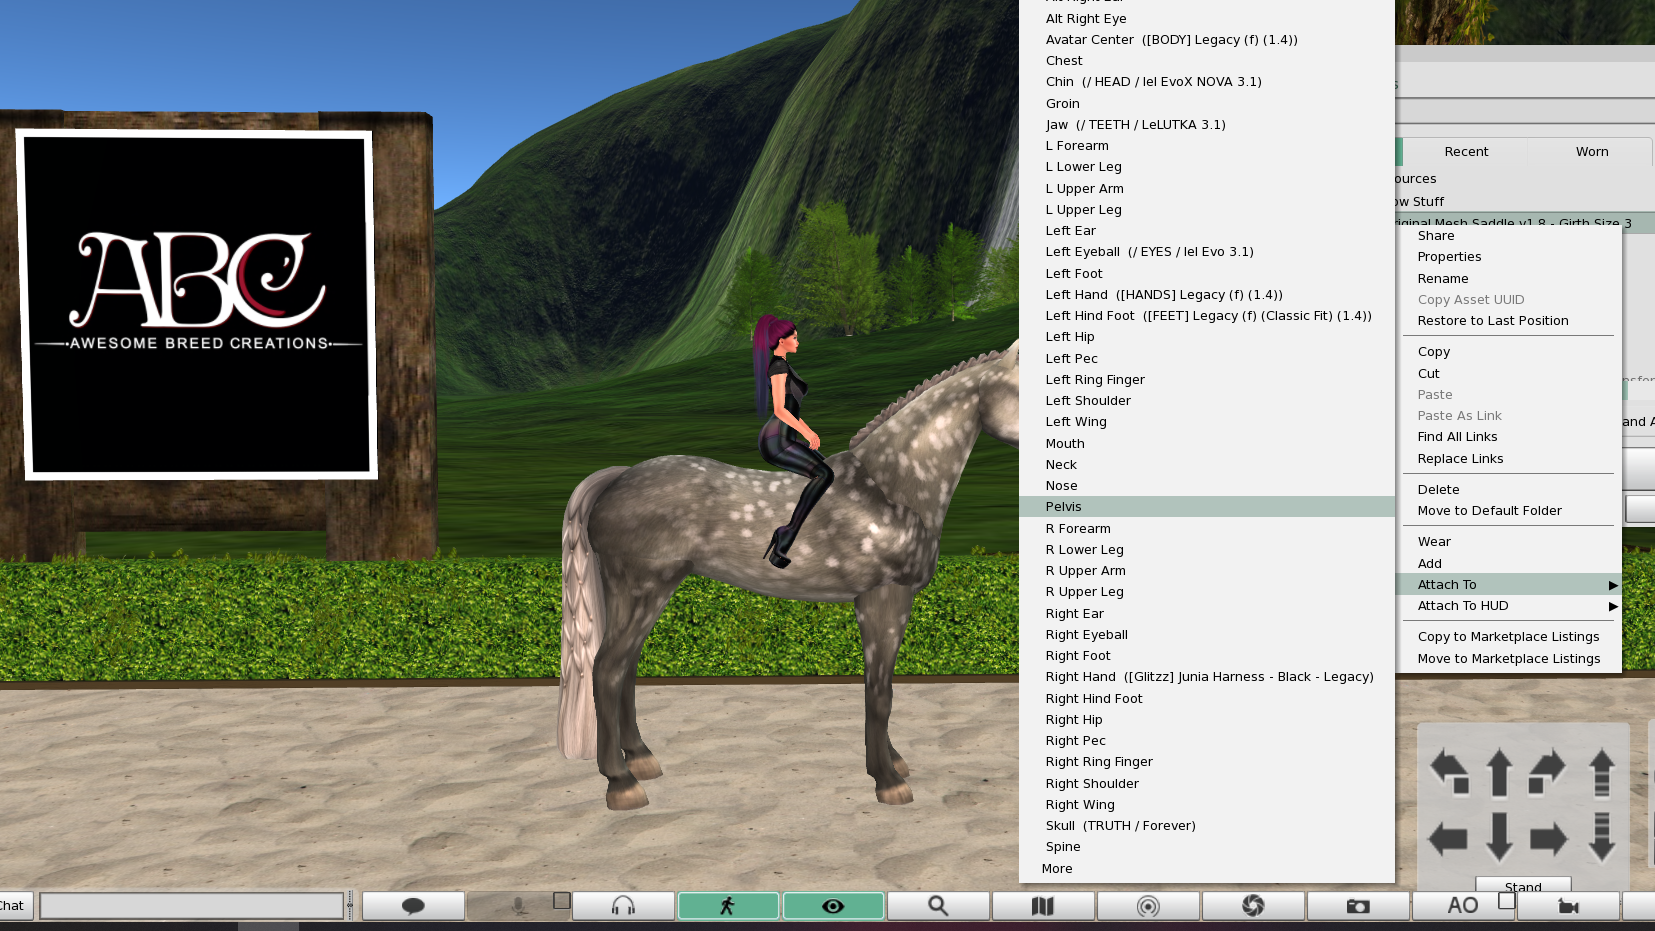
Rez your horse, then Right Click on your horse and choose Ride. Navigate to the folder you just created in your inventory. Right Click on each item separately and choose Attach To > Pelvis. You will only need to do this the first time you attach your items.
NOTE: After attaching the first item, the Pelvis will show as having that item already attached, however you can attach more than one item to any single area of the avatar. So continue adding all those in your folder to the Pelvis.
STEP 3
Move tool
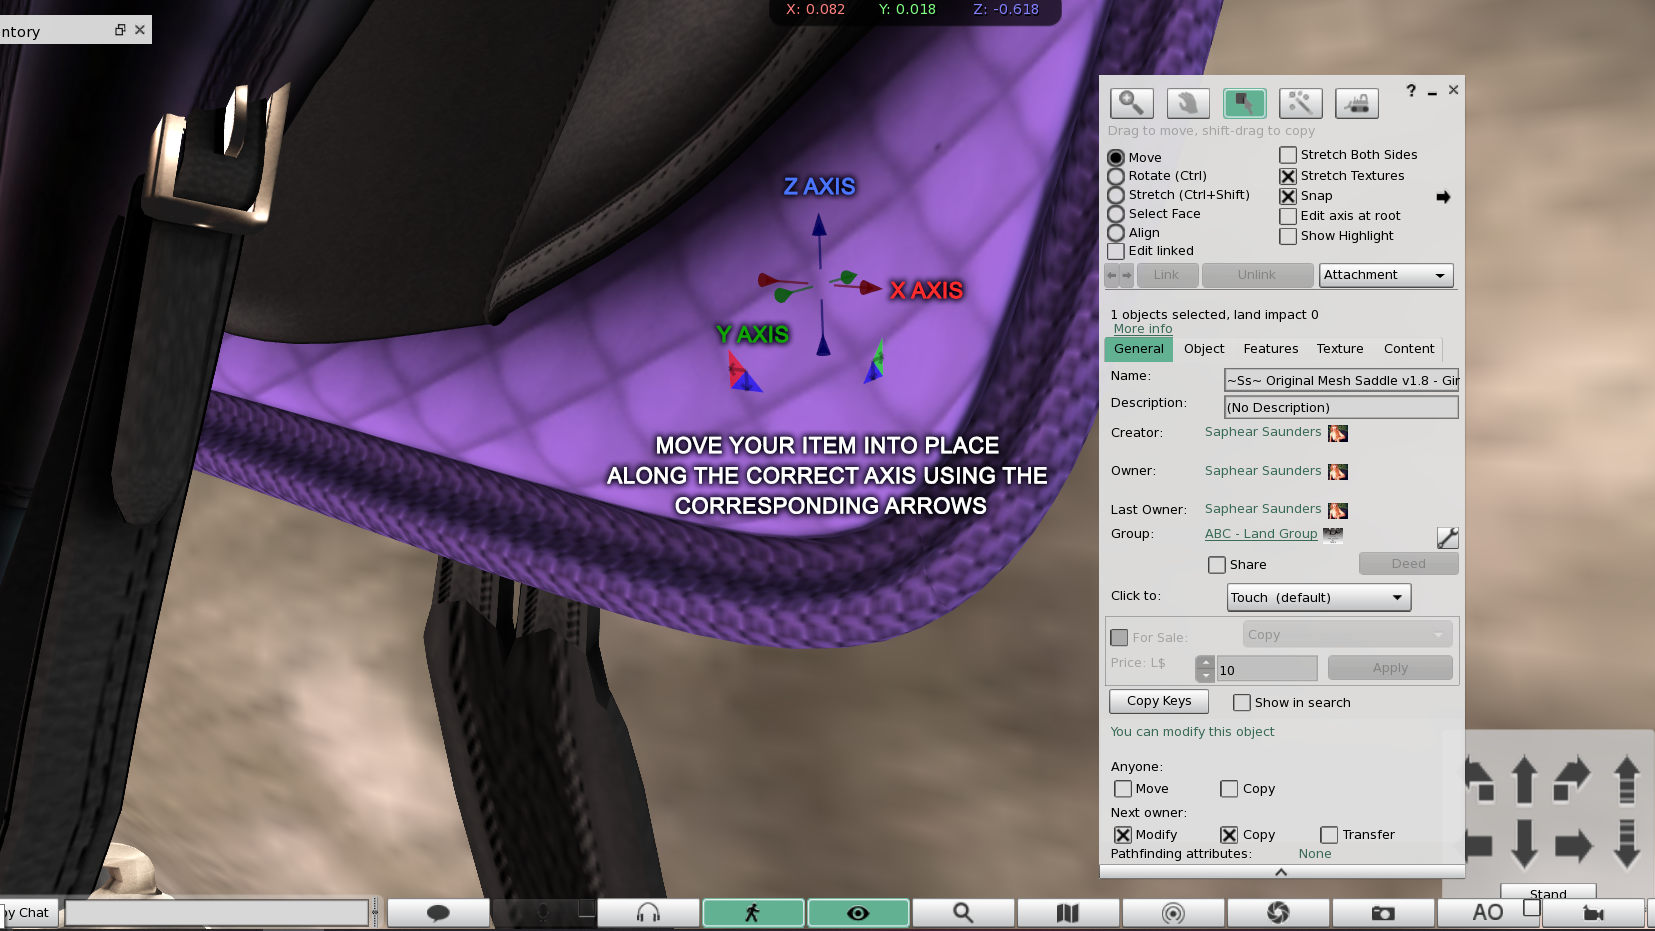
Once all items in your folder have been attached, we will edit them one by one in place. To do this, Right Click on the first item, in this case, the saddle then choose Edit. The Edit window will open. Select the Move option.
A number of arrows will now be available for you to drag and move. Each arrow represents a different axis or direction. Click and hold the necessary arrow to adjust your item in place.
TIP 1: Holding Control + Alt (PC) or Command + Alt (Mac) whilst left-clicking and holding your mouse will enable you to easily rotate around your item with the camera. Releasing the keyboard buttons will exit.
TIP 2. Control + Z (PC) or Command + Z (Mac) will UNDO any build action.
STEP 4
Rotate tool
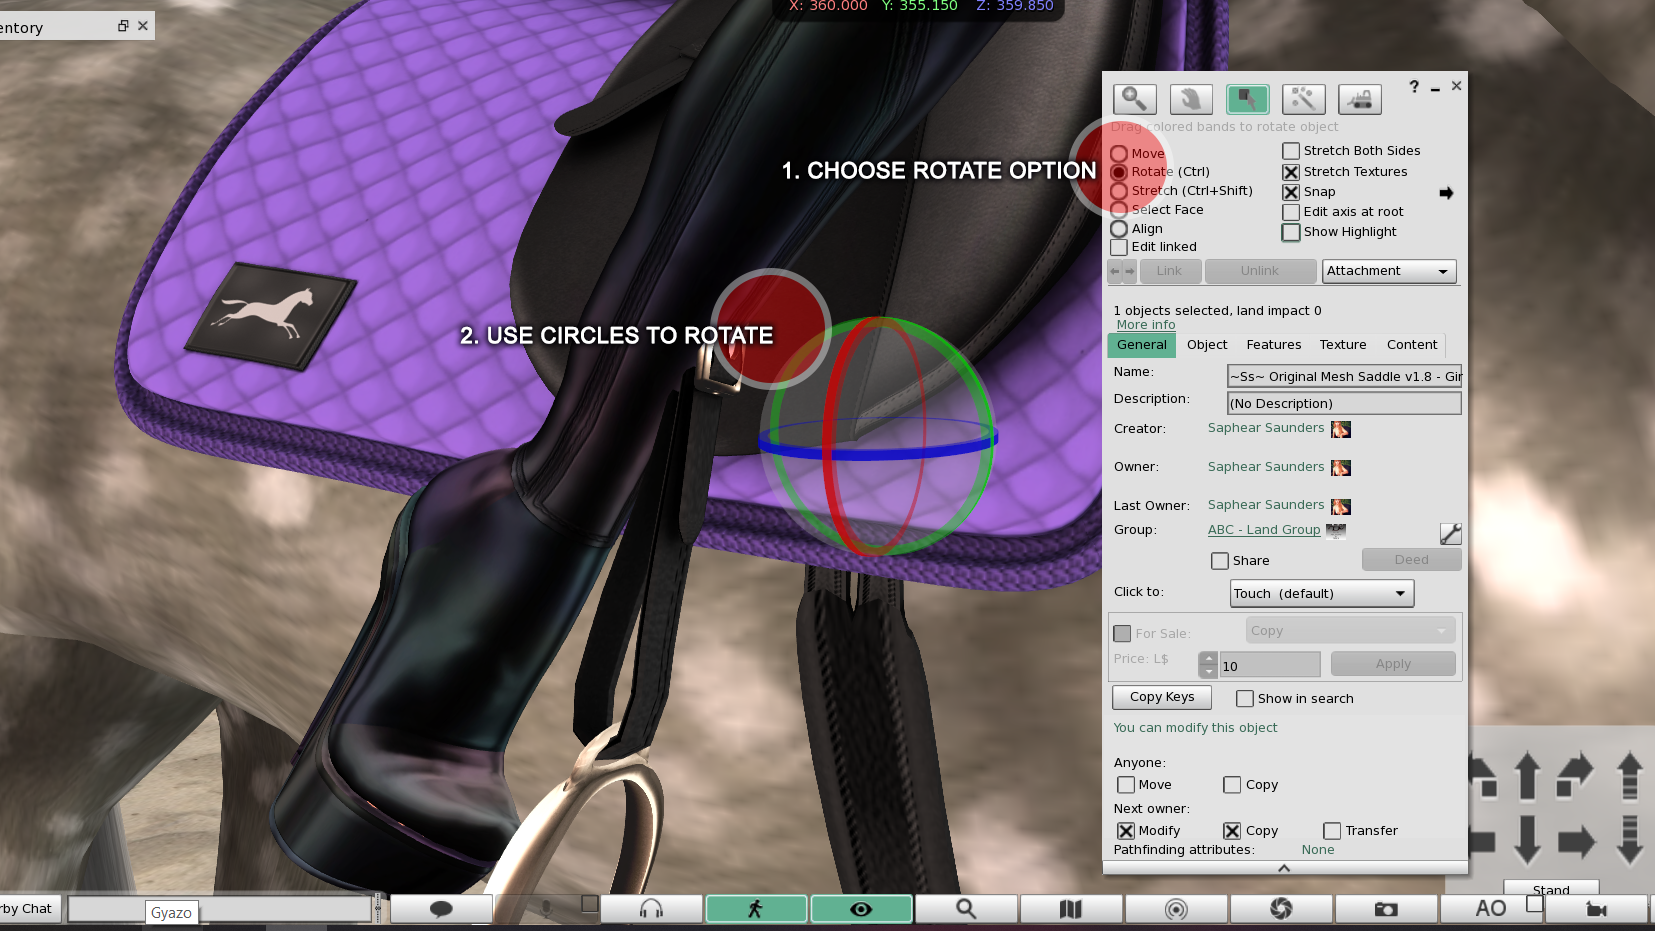
Like the move tool, it is also possible to adjust your item by rotating it. To do this, Right Click on the item, then choose Edit. The Edit window will open. Select the Rotate option.
Instead of arrows, you will now see some circles. Each circle represents a different axis or direction. Click and hold the necessary circle to rotate your item as needed.
TIP: Holding and releasing Control (PC) or Command (Mac) whilst in the edit move window will quickly switch between the rotate and move tools/functions.
STEP 5
Stretch tool
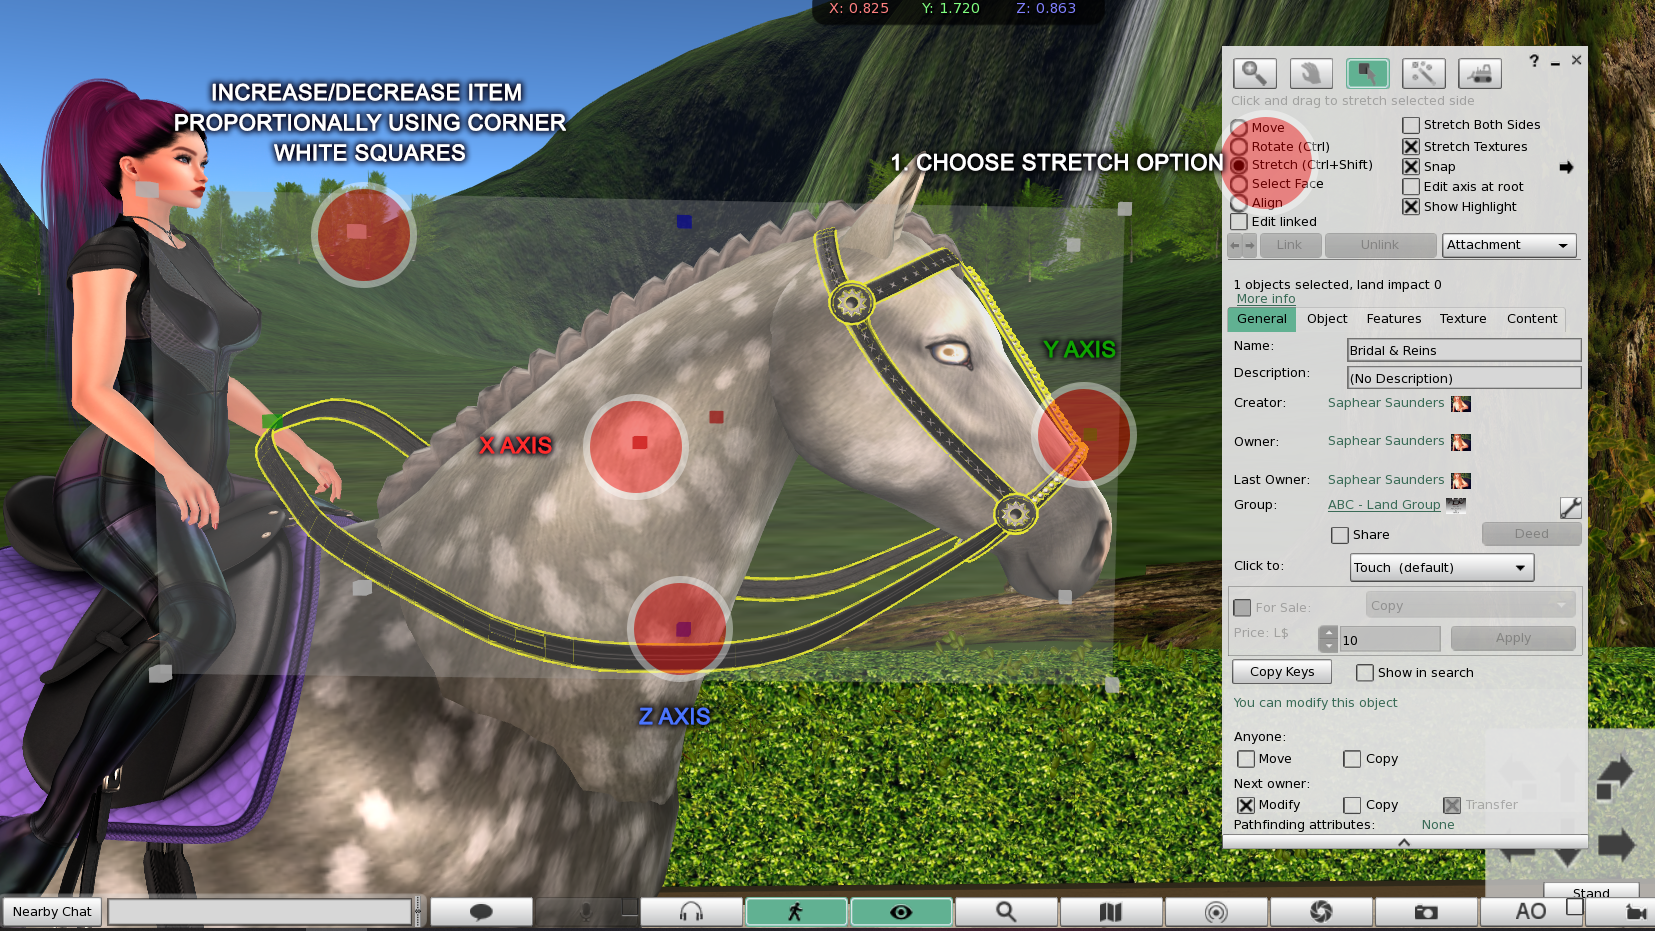
To increase or decrease the size of your item you have the option of using the stretch tool. Right Click on the item, then choose Edit. The Edit window will open. Select the Stretch option.
This time, a bounding box for the entire item will appear and on each side of the bounding box, you will see some small colored squares representing each axis of stretch. You can move/drag these in and out along the axis, but keep in mind this will also distort your item along the axis. If you wish to scale everything proportionally, you will also see on each corner small white boxes. Use these to keep the scale of the item as a whole and keeping its original constraints.
Additionally, ensure you have 2 options ticked and unticked in the edit window when stretching. Firstly, Untick > Stretch Both Sides. Secondly, Tick > Stretch Textures.
TIP: Holding and releasing Control (PC) + Shift or Command (Mac) + Shift whilst in the edit move window will quickly switch between the stretch and move tools/functions.
STEP 6
Edit linked parts
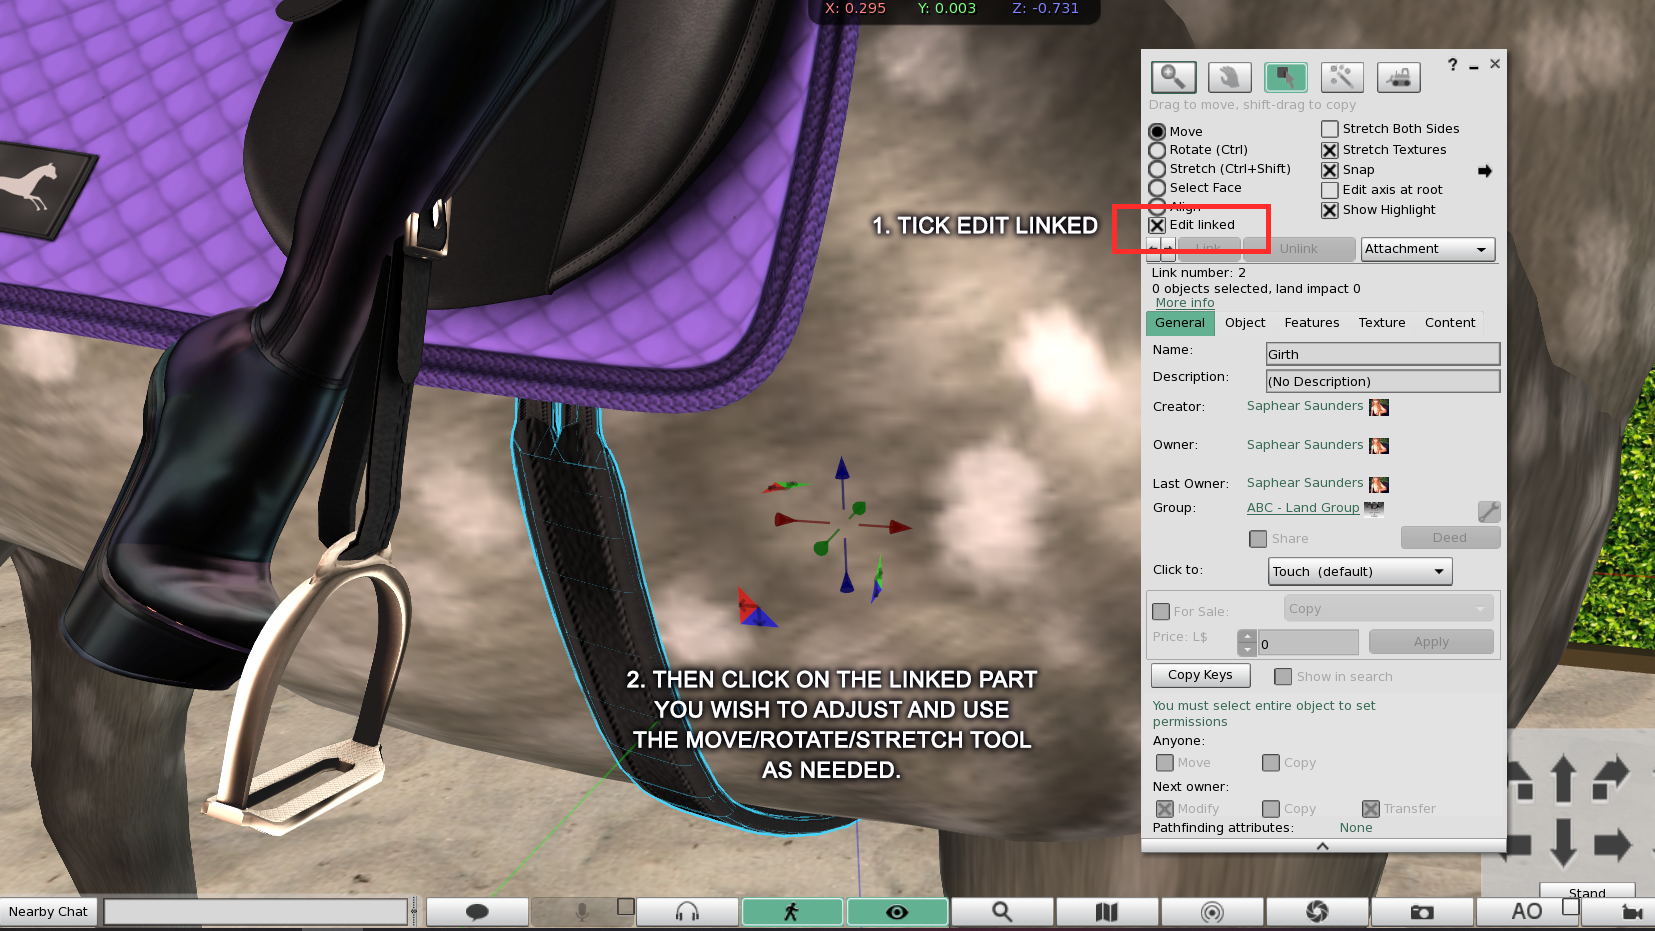
If you are editing an item that is made up of multiple linked parts, it is possible to select and edit each piece individually.
Whist you have the edit window option and you are in any of the edit functions (Move, Rotate, Stretch) you can Tick > Edit Linked. Then click on the part you wish to edit and it will only select that piece.
This is now ready to adjust like you would any other item normally however any edits you make will only affect this piece, keeping the rest of your edits in place.
STEP 7
color tinting items/pieces
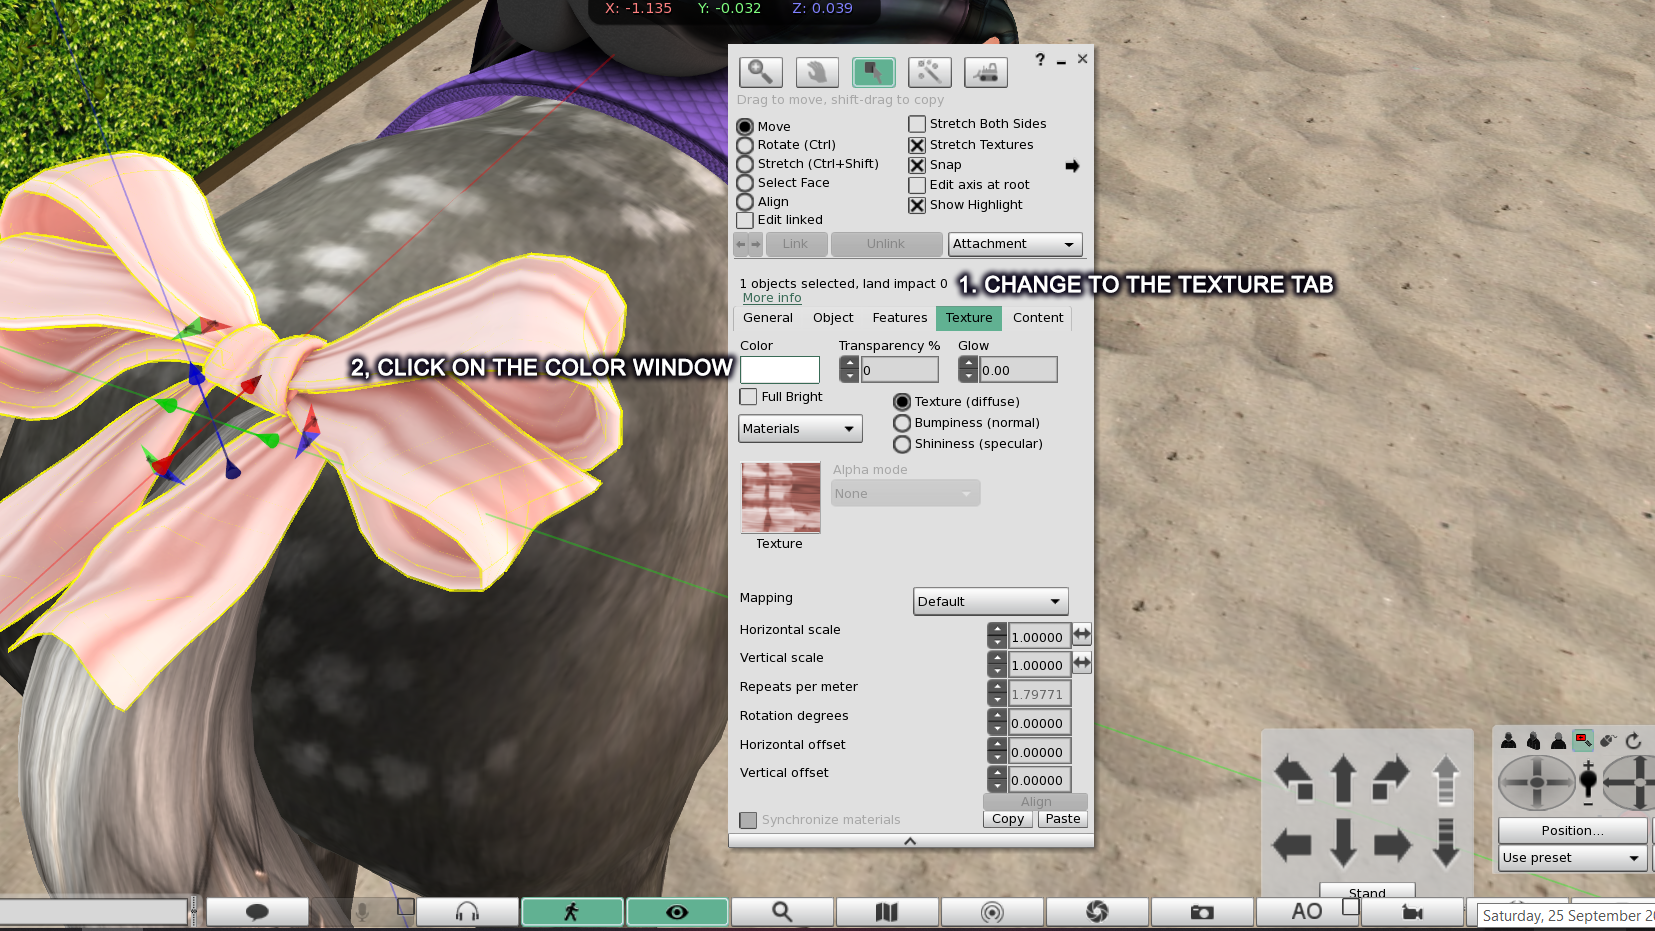
It is possible to tint any whole item or while you are in edit linked. To do this, switch from the General Tab to the Texture Tab. Click on Color box to open the Color Window.
In the color window, it is possible to tint your item by choosing any of the predetermined colors, changing the Hue, Saturation, and Luminance, or clicking anywhere in the color spectrum window. Press OK when you are done.
TIP: From within the Texture Tab, it is also possible to adjust the Transparency, Glow and add Full Bright to your item using the appropriate options.
STEP 8
save all edits
Once you are satisfied with all adjustments and edits, it is important to save these changes. You can do this two ways. First, you can Right Click on your item then choose Detach.
Second, you can also navigate to the folder in your inventory, Right Click on your item then choose Detach From Yourself.
Whichever method you decide will save your edits so that next time you wear/add them, they will be in place just as adjusted.

STEP 9
Add items from inventory
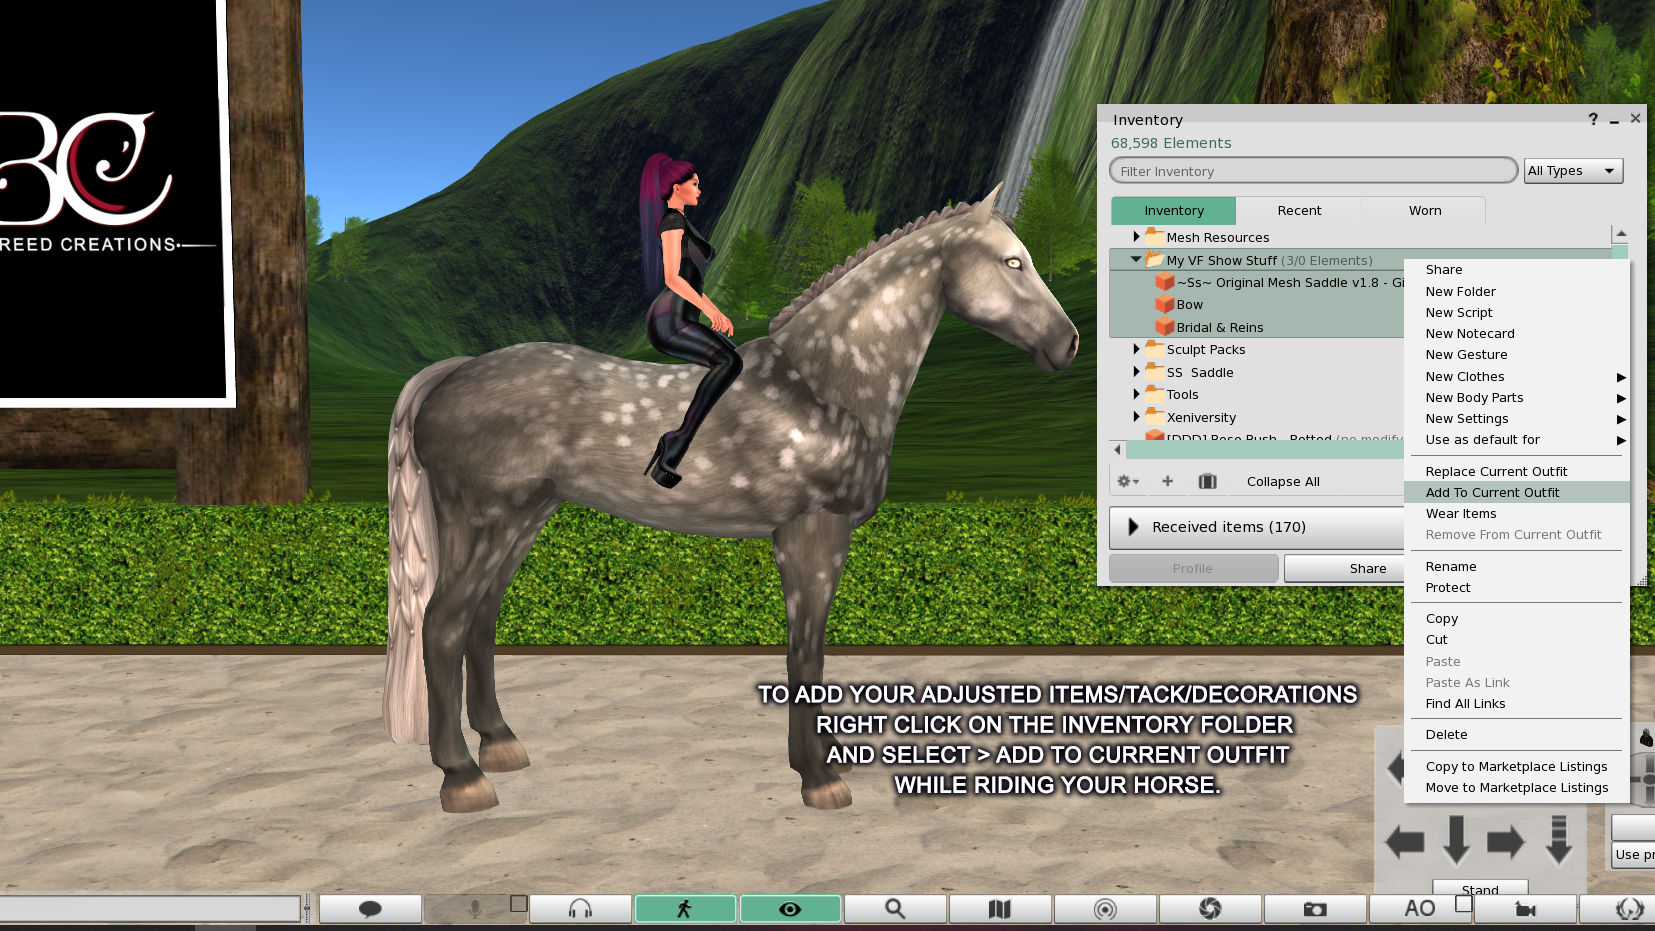
Once you have finished editing all your items and saving the edits by detaching them, it is very easy to quickly add them to your current outfit.
Ride your horse, then, find the folder with your items in your inventory, Right Click on your Folder and Choose > Add to Current Outfit.
Because you saved the position and all edits when you detached, everything will be in place on the pelvis.
All your adjusted tack and decorations will now apply to your current outfit in the adjusted positions you made.
STEP 10
Save outfit & quickly replace outfit
If you wish to save your adjusted horse tack/items/decorations with your avatar’s attire and avatar attachments this can also be achieved. The benefit to this option is that you can save multiple outfits for the day and change quickly with a single click, changing both your horse and avatar’s look instantly.
- Get dressed in your desired look. Remember everything attached/worn on your avatar will be saved to your outfit. This includes clothing, hair, body parts, shoes and even HUDS, so to avoid unwanted lag, be sure to remember to take off anything that is not needed.
- Next Ride your Horse and Add to Current Outfit the folder with your adjusted tack/horse items.
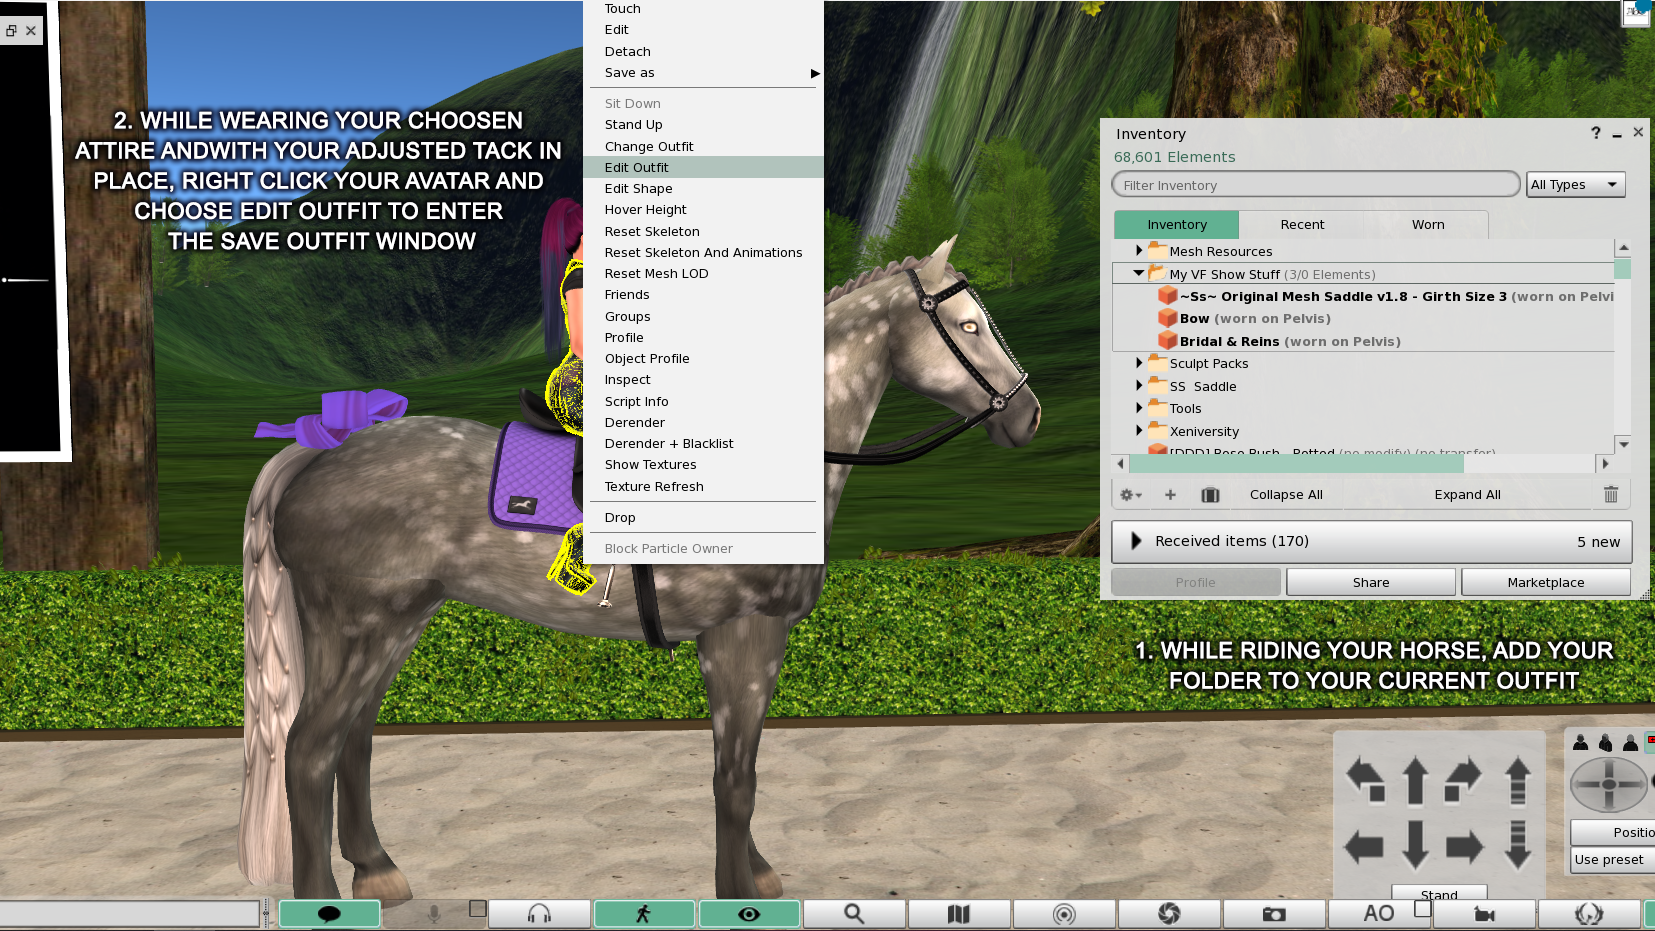
- Right Click on your avatar and Choose > Edit Outfit, your avatar will jump off your horse and a new Edit Outfit Window will pop up.
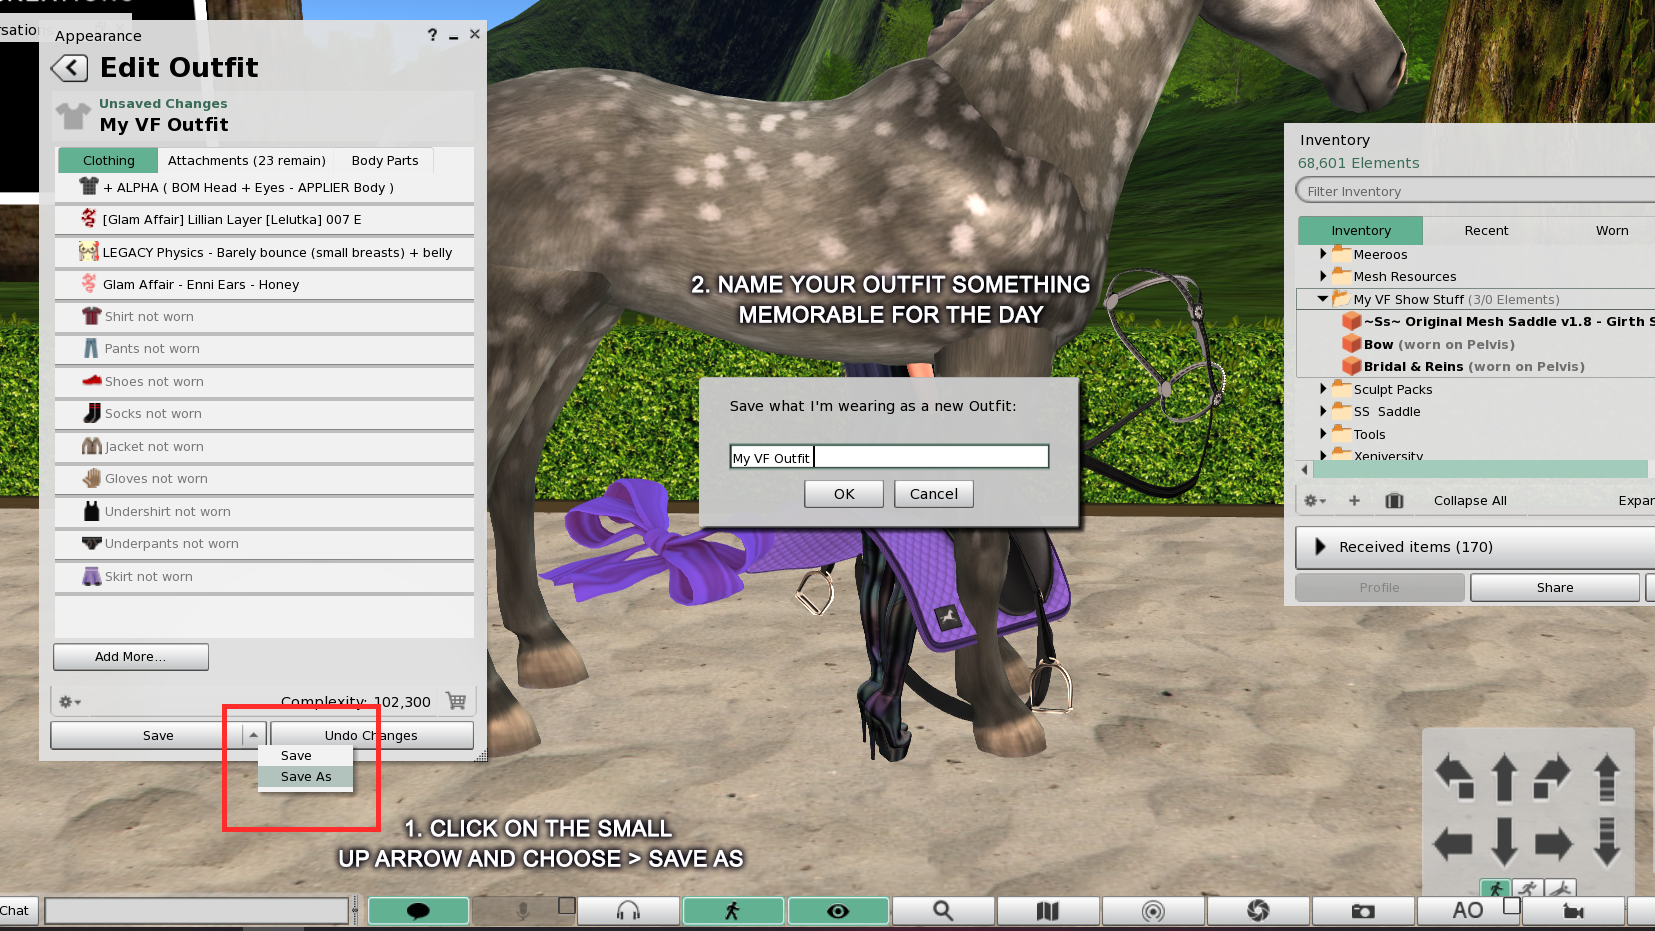
- Look for the small Up Arrow and Click > Save As. Give your outfit a memorable name.
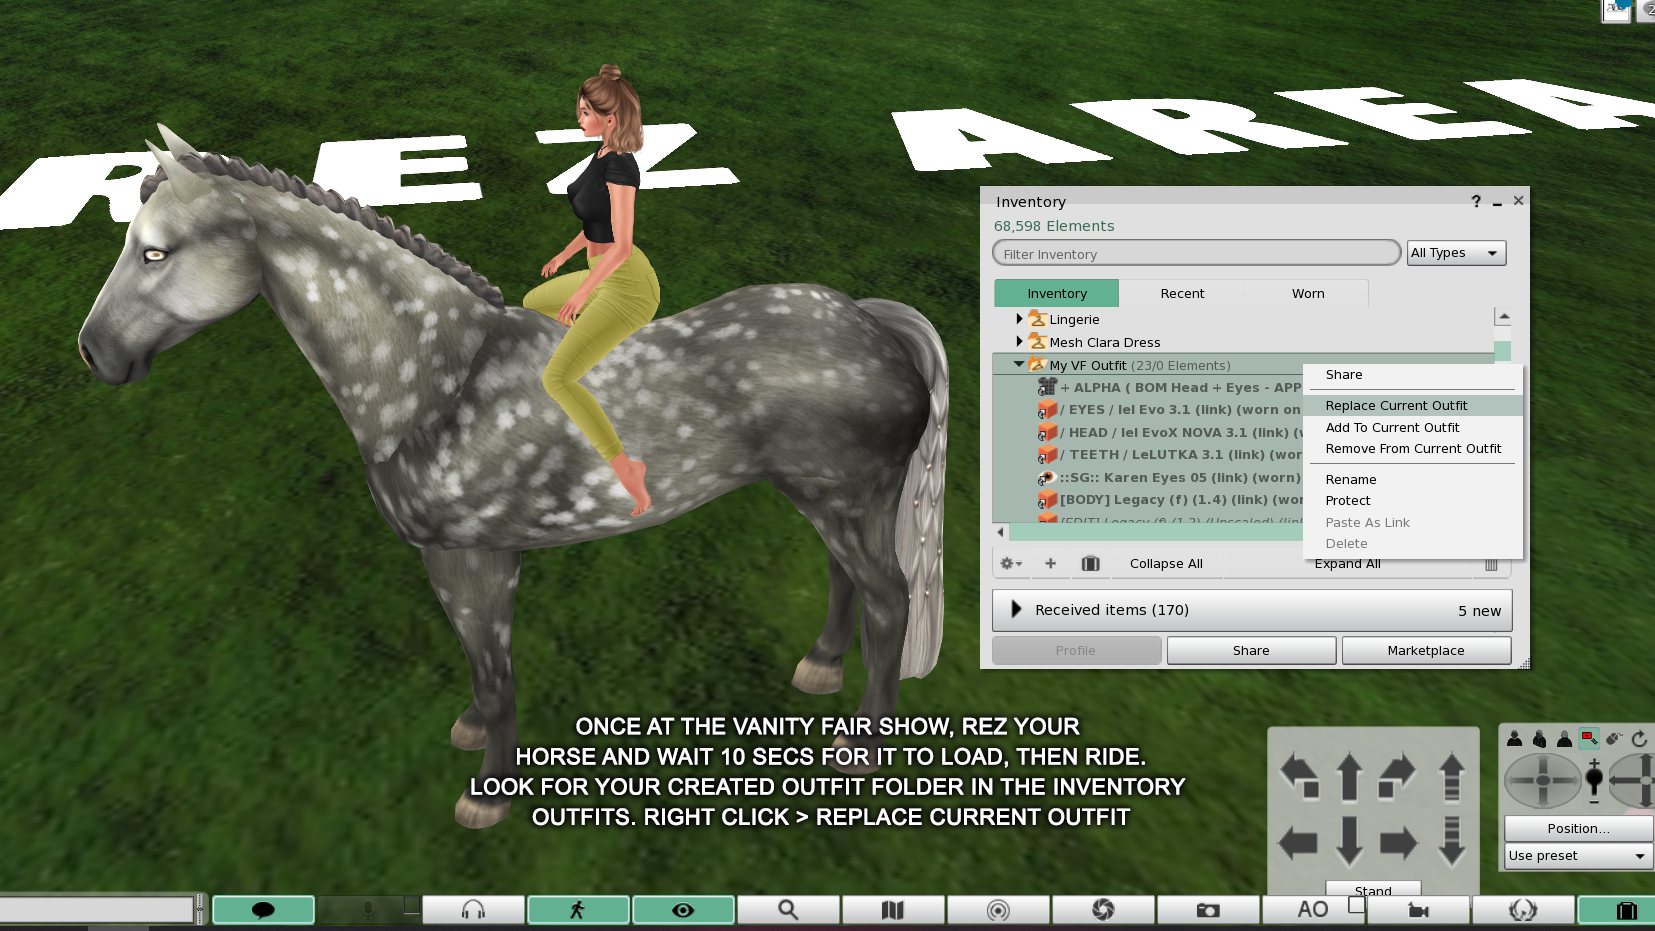
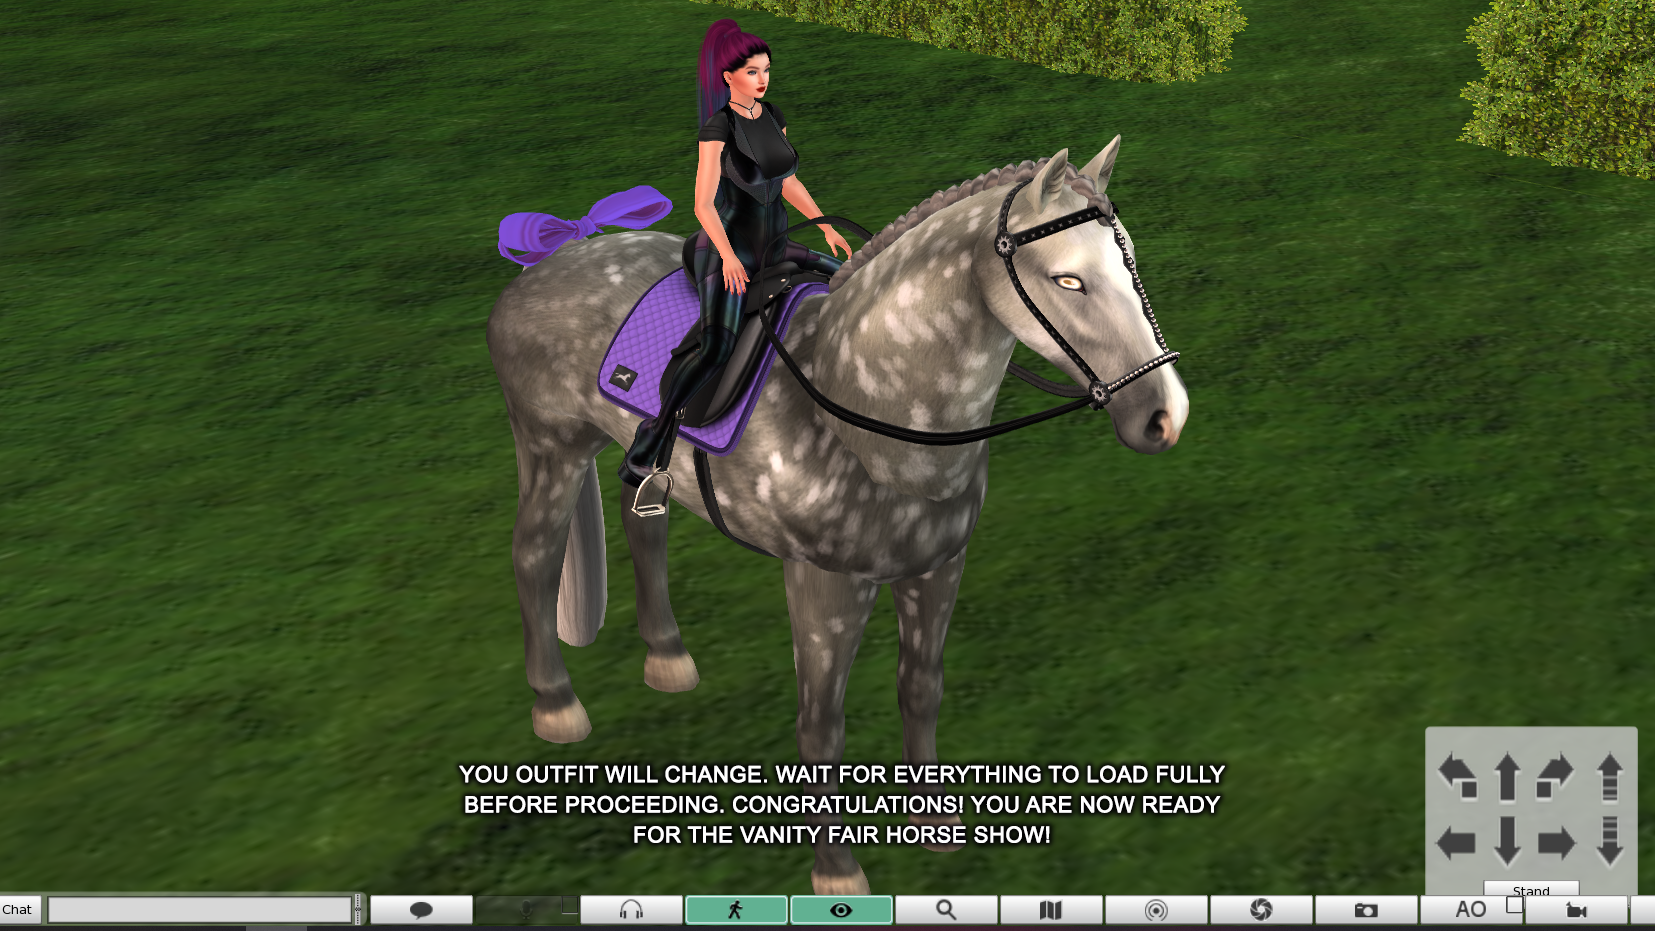
- To change to you saved outfit on the day, Rez your horse, wait 10 secs for it to fully load then Ride your Horse. Look for your created outfit folder in your Inventory Outfits. Right Click > Replace Current Outfit and wait for everything to load.
Congratulations! You are now ready to join the Vanity Fair Horse Show. Have fun creating your outfits and we look forward to seeing you out there in the Vanity Fair Horse Show Fairgrounds.
